


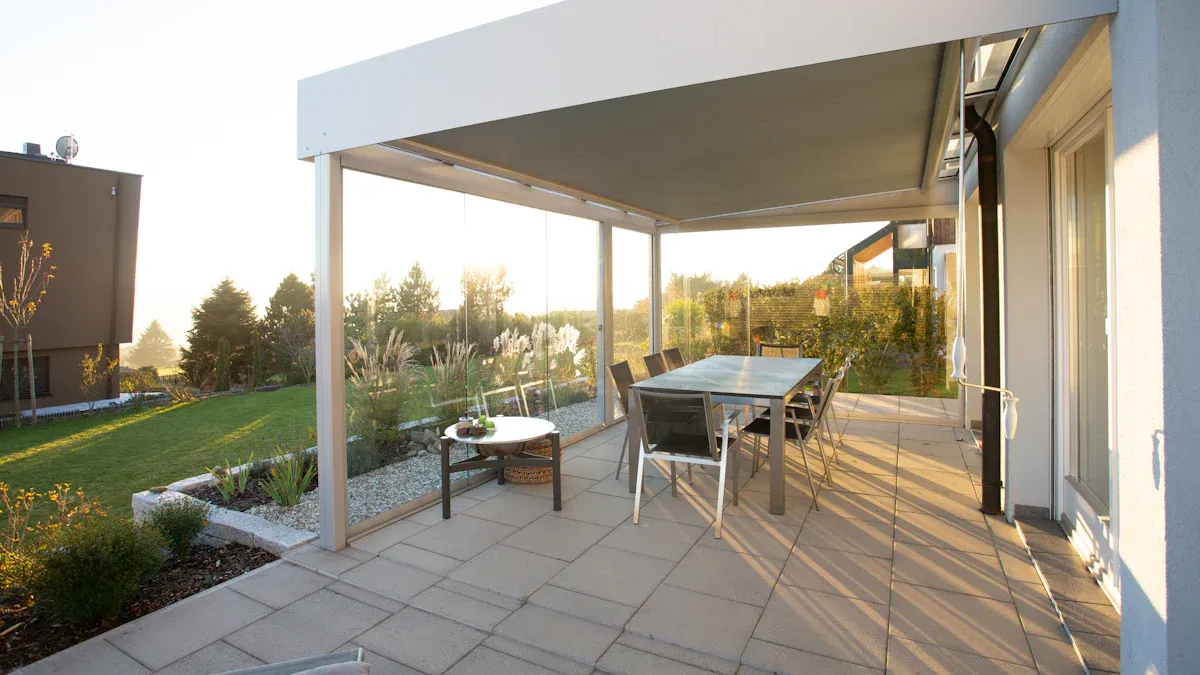
Transform your outdoor space with the timeless charm of an aluminum pergola. These structures not only enhance your backyard’s aesthetics but also create a functional retreat for relaxation or gatherings. Installing one yourself offers unique benefits. You save on labor costs, which can significantly reduce expenses, and you gain the satisfaction of completing a rewarding project. Whether you choose a freestanding design or a Wall Mounted Pergola, the process is straightforward with the right guidance. Dive into our Pergolas Collection and discover how easy it is to bring your vision to life.
Key Takeaways
Aluminum pergolas are strong and can handle any weather. Checking them often and protecting them helps them last longer.
They need less care than wood, saving you time. Cleaning them is easy, and you don’t need to paint or fix them often.
Plan well before building. Pick a flat spot and check local rules to avoid problems.
Get tools like a drill and measuring tape ready first. Having everything prepared makes building easier.
Add lights or plants to make your pergola look nice. Clean and check it often to keep it in good condition.
Why Aluminum Pergolas Are a Great Choice
Benefits of Aluminum Pergolas
Durability and Weather Resistance
Aluminum pergolas stand out for their exceptional durability. Built from heavy-gauge aluminum, these structures resist rust and corrosion, making them ideal for various climates. Whether you face harsh sunlight, heavy rain, or snow, an aluminum pergola maintains its structural integrity. The stain-resistant coating further enhances its longevity, ensuring it looks great for years.
Tip: Regular inspections and occasional protective measures, like applying sealants, can help preserve your pergola’s aesthetic appeal and structural strength.
Low Maintenance
If you prefer a hassle-free outdoor structure, an aluminum pergola is the perfect choice. Unlike wood, aluminum does not rot or attract termites. It requires minimal upkeep, with simple cleaning being enough to maintain its appearance. You won’t need to worry about painting or frequent repairs, saving you time and effort.
Feature |
Description |
|---|---|
Requires minimal upkeep, making it an attractive option for hassle-free use. |
|
Durability |
Resistant to rust and corrosion, ensuring longevity even in harsh conditions. |
Modern Aesthetic Appeal
Aluminum pergolas offer a sleek, contemporary look that complements any outdoor space. Their clean lines and minimalist design create a stylish focal point in your backyard, patio, or garden. You can choose from various sizes and styles to match your preferences, ensuring your pergola enhances both functionality and aesthetics.
Features of Aoodor Aluminum Pergolas
High-Quality Materials
Aoodor aluminum pergolas are crafted with lightweight yet robust aluminum frames. This material provides excellent corrosion resistance, ensuring your pergola lasts for years. The durable construction withstands harsh weather conditions, making it a reliable addition to your outdoor space.
Adjustable Canopies and Versatile Designs
One of the standout features of Aoodor pergolas is their versatility. Many models come with adjustable canopies, allowing you to control sunlight and shade effortlessly. Whether you want a cozy retreat or an open space for gatherings, these pergolas adapt to your needs. Their customizable designs fit various garden sizes, making them a practical and stylish solution for any outdoor area.
Tools and Materials for Installation
Before starting your aluminum pergola installation, gather the necessary tools and materials. Having everything ready ensures a smooth and efficient process.
Essential Tools
Measuring Tape and Level
Accurate measurements are crucial for a successful pergola installation. Use a measuring tape to mark precise dimensions and a level to ensure the structure remains even. These tools help you avoid misalignments that could compromise stability.
Power Drill and Screwdriver
A power drill simplifies the process of securing screws and bolts. Pair it with a screwdriver for tasks requiring finer adjustments. These tools are essential for assembling the pergola frame and attaching components.
Wrenches and Sockets
Wrenches and sockets allow you to tighten bolts and nuts securely. They ensure the pergola remains sturdy and safe. Keep a variety of sizes on hand to accommodate different hardware.
Tip: Organize your tools in a toolbox for easy access during the installation process.
Materials Checklist
Aoodor Aluminum Pergola Kit
The Aoodor aluminum pergola kits include all the primary components needed for your project. These kits feature high-quality aluminum frames, adjustable canopies, and detailed instructions for easy assembly.
Anchors, Screws, and Bolts
Secure your pergola firmly with anchors, screws, and bolts. These materials provide the necessary support to withstand outdoor conditions. Check that the hardware matches the specifications of your pergola kit.
Concrete or Ground Stakes (if required)
For added stability, use concrete or ground stakes to anchor the pergola posts. This step is especially important for installations on uneven or soft ground. Concrete provides a permanent solution, while stakes offer flexibility.
Note: Always double-check the materials list in your pergola kit to ensure nothing is missing before you begin.
Preparing for Aluminum Pergola Installation
Selecting the Perfect Location
Assessing Sunlight and Shade
Choosing the right spot for your pergola involves understanding how sunlight and shade interact with your outdoor space. Start by observing your site’s geographic location and climate patterns. Take note of nearby buildings or trees that might block sunlight or cast shadows. For precise analysis, consider using tools like SketchUp or Autodesk Revit to map the sun’s movement throughout the day. This helps you determine the best placement for maximizing shade during peak sunlight hours. Adjust your pergola’s design based on these findings to create a comfortable and functional retreat.
Ensuring Level Ground
A level surface is essential for a stable pergola installation. Uneven ground can compromise the structure’s safety and appearance. Use a level to check the ground where you plan to install the pergola. If the area is sloped, you may need to level it by adding soil or using concrete footings. Taking the time to prepare a flat surface ensures your pergola remains secure and visually appealing.
Measuring and Marking the Area
Marking Post Locations
Accurate measurements are critical for a successful installation. Begin by marking the locations for the pergola’s posts. Use a measuring tape to ensure the distances between posts match the dimensions specified in your pergola kit. Mark these spots clearly with stakes or chalk to avoid confusion during the installation process.
Ensuring Proper Spacing
Proper spacing between posts ensures your pergola’s stability and aesthetic appeal. Double-check your measurements to confirm they align with the pergola’s design. Use a level to verify that the markings form a straight line. This step prevents misalignments that could affect the pergola’s overall structure.
Checking Permits and Local Codes
Understanding Zoning Requirements
Before starting your pergola installation, check with local authorities to understand zoning requirements. Many areas require permits for outdoor structures, including pergolas. Regulations may specify height restrictions, setback distances from property lines, and approved materials. Ensuring compliance with these rules avoids potential fines or the need to modify your pergola later.
Avoiding Utility Lines
Safety should always be a priority during installation. Before digging or anchoring posts, contact your local utility company to identify underground lines. Avoiding these lines prevents accidents and ensures a smooth installation process. Mark any identified lines clearly to guide your work.
Tip: Keeping a copy of your local building codes on hand can help you stay compliant throughout the project.
Step-by-Step Installation Process
Assembling the Pergola Frame
Unpacking and Organizing Components
Start by unpacking your pergola kit and organizing all components. Lay them out in a clear workspace to ensure nothing is missing. Group similar parts together, such as beams, rafters, and hardware, for easy access. This preparation step saves time and reduces confusion during assembly.
Tip: Double-check the included instruction manual to confirm all parts match the list provided in your pergola kit.
Following Manufacturer’s Instructions
Carefully follow the manufacturer’s instructions for assembling the pergola frame. Begin by identifying the base components and connecting them as directed. Use pre-drilled holes to guide screw placement, ensuring a secure fit. Tighten bolts and screws firmly but avoid over-tightening, which could damage the aluminum.
Step-by-Step Guide:
Attach the base frame components.
Securely fasten the horizontal beams.
Check alignment with a level before proceeding.
Installing the Posts
Anchoring Posts to Concrete or Ground
Properly anchoring the posts is crucial for a stable pergola installation. If installing on concrete, use post anchors and bolts to secure the structure. For ground installations, dig post holes and fill them with concrete to create a solid foundation. Allow the concrete to cure fully before proceeding.
A solid foundation ensures the pergola withstands weather conditions and remains stable over time.
Consider local terrain and weather when choosing the anchoring method.
Ensuring Posts Are Level and Secure
Use a level to check that each post is perfectly vertical. Adjust as needed before securing them completely. Misaligned posts can compromise the pergola’s stability and appearance. Once aligned, tighten all bolts and anchors to ensure the posts remain secure.
Tips for Pergola Assembly: Mark post locations clearly before anchoring to avoid errors.
Attaching Beams and Rafters
Aligning and Securing Beams
Position the horizontal beams on top of the posts. Align them carefully to ensure they are straight and level. Secure the beams using screws or brackets, following the manufacturer’s guidelines. Pre-drilled holes simplify this step and help maintain accuracy.
Adding Rafters for Structural Support
Attach the rafters to the beams, spacing them evenly for both support and aesthetics. Use screws or bolts to secure each rafter firmly. This step enhances the pergola’s structural integrity and provides a base for additional features like canopies or decorative elements.
Note: Reinforce connections with brackets or additional hardware for long-term durability.
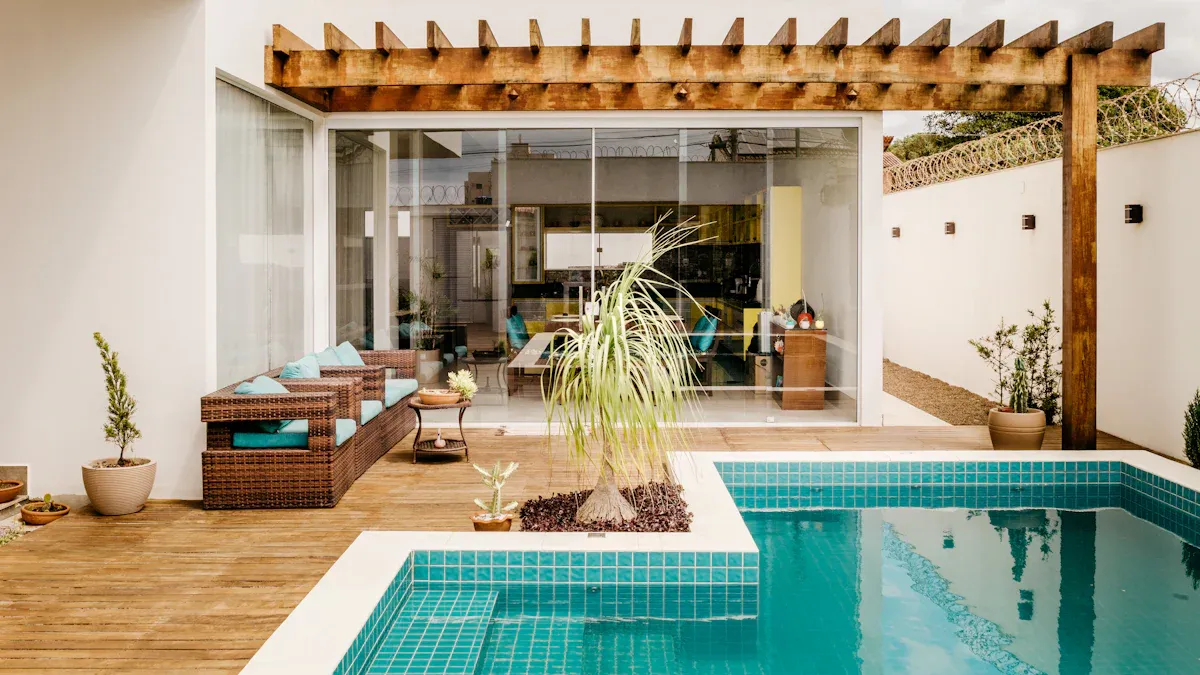
Adding Finishing Touches
Installing Decorative Elements
Adding decorative elements to your pergola enhances its visual appeal and makes it uniquely yours. Start by considering features like string lights, hanging plants, or outdoor curtains. String lights create a warm and inviting atmosphere, perfect for evening gatherings. Hanging plants add a touch of greenery, blending your pergola seamlessly with the surrounding garden. Outdoor curtains provide privacy and a cozy feel, especially in open spaces.
You can also incorporate furniture that complements the pergola’s design. Choose weather-resistant materials to ensure durability. Arrange seating and tables to create a functional space for relaxation or entertaining guests. If you prefer a more artistic touch, consider adding decorative panels or latticework to the sides of the pergola. These elements not only enhance the structure’s beauty but also provide additional shade and privacy.
Tip: Use color-coordinated accessories to match your pergola’s style and the overall theme of your outdoor space.
Applying Protective Coatings (if needed)
Protective coatings can extend the life of your pergola and maintain its appearance. While aluminum pergolas are naturally resistant to rust and corrosion, applying a protective sealant adds an extra layer of defense. This step is especially useful if your pergola is exposed to extreme weather conditions.
Begin by cleaning the pergola thoroughly to remove dirt and debris. Use a mild detergent and water, then let it dry completely. Apply the protective coating evenly using a brush or spray. Follow the manufacturer’s instructions for the best results. Regular maintenance, such as reapplying the coating every few years, ensures your pergola remains in excellent condition.
Note: Always test the protective coating on a small, inconspicuous area before applying it to the entire pergola.
Adding these finishing touches transforms your pergola into a stylish and functional outdoor retreat. Whether you focus on decorative elements or protective measures, these steps ensure your pergola stands out and lasts for years.
Overcoming Common Installation Challenges
Uneven Ground or Sloping Surfaces
Solutions for Leveling the Base
Installing a pergola on uneven ground can seem challenging, but you can overcome this with the right techniques. Start by assessing the slope and identifying the best leveling method for your situation. Concrete piers and Simpson Deck Post Fasteners provide excellent stability on uneven terrain. These create a solid foundation, ensuring your pergola remains secure.
For sloped surfaces, adjustable post bases are a practical solution. These bases allow you to modify the height of each post, accommodating the slope and maintaining a level structure. If you’re installing on an existing deck, spacers or sheet PVC can help create a level base without major modifications.
Tip: Use a level frequently during this process to ensure accuracy and avoid structural issues later.
Technique |
Description |
|---|---|
Concrete Piers and Simpson Fasteners |
Provide stability on uneven ground, ensuring a reliable foundation for the pergola. |
Adjustable Post Bases |
Allow for easy installation and adjustment to fit the slope of the land, enhancing stability. |
Spacers and Sheet PVC |
Create a level low leg setup on existing surfaces, offering versatility in installation. |
Misaligned Components
Adjusting and Rechecking Measurements
Misaligned components can disrupt the pergola’s appearance and stability. To address this, recheck all measurements before securing any parts. Use a measuring tape and level to confirm that beams, rafters, and posts align correctly. If you notice misalignment, loosen the affected connections and adjust them until they are straight.
Marking post locations clearly during the initial setup can prevent alignment issues. Double-check these markings against the pergola’s design specifications. Taking your time during this step ensures a smoother installation process and a more professional result.
Note: Always tighten bolts and screws only after confirming proper alignment.
Loose or Wobbly Posts
Reinforcing with Additional Anchors
Loose or wobbly posts can compromise the pergola’s stability. Reinforce these posts by adding extra anchors or using concrete footings. For installations on soft ground, dig deeper post holes and fill them with concrete to create a stronger base.
If the posts remain unstable, consider using diagonal braces for additional support. These braces connect the posts to the beams, reducing movement and enhancing the pergola’s overall strength. Regularly inspect the posts after installation to ensure they remain secure over time.
Tip: Tighten all bolts and screws periodically to maintain the pergola’s stability.
DIY vs. Professional Installation
Advantages of DIY Installation
Cost Savings
Installing a pergola yourself can save you a significant amount of money. Labor costs for professional pergola installation often account for a large portion of the total expense. By taking on the project yourself, you eliminate this cost entirely. The table below highlights the cost comparison between DIY and professional installation:
Installation Type |
Pros |
Cons |
|---|---|---|
Professional |
Expert craftsmanship |
Higher cost |
Faster installation |
||
Peace of mind |
||
DIY |
Cost-saving |
Time-consuming |
Personal satisfaction |
Potential for errors |
Additionally, the total cost of a DIY pergola installation typically ranges from $1,500 to $5,000, depending on factors like material choices, finishing touches, and optional features. This approach allows you to control your budget while still achieving a high-quality result.
Personal Satisfaction
Completing a pergola installation on your own brings a sense of accomplishment. You gain hands-on experience and the pride of creating a functional and stylish addition to your outdoor space. This personal touch makes the pergola uniquely yours, reflecting your effort and creativity.
When to Consider Professional Help
Complex Installations or Custom Designs
Some pergola projects require professional expertise. For example:
Professionals ensure a flawless finish, enhancing the pergola’s durability and aesthetic appeal.
They can handle complex customizations, such as integrating lighting or privacy screens.
They also navigate zoning permits and avoid hazards like underground power lines.
Lack of Tools or Experience
If you lack the necessary tools or experience, hiring a professional can save time and prevent costly mistakes. Improper installations may lead to structural vulnerabilities, such as instability during strong winds. Professionals bring the skills and equipment needed to complete the job efficiently and safely.
Tip: Evaluate your skills and the project’s complexity before deciding between DIY and professional installation.
Installing an aluminum pergola transforms your outdoor space into a stylish and functional retreat. To recap, the process involves:
Planning and designing the pergola, including size and location.
Gathering tools like a power drill and materials such as concrete mix.
Preparing the ground for stability and securing the posts.
Attaching crossbeams and adding finishing touches like lighting or shading.
These steps ensure a smooth installation and a durable structure. Aluminum pergolas stand out for their modern design and weather resistance. They require minimal upkeep, making them a practical and long-lasting addition to any backyard.
Take the first step today. Whether you choose a DIY approach or consult a professional, your aluminum pergola will enhance your outdoor living experience for years to come.
FAQ
How long does it take to install an aluminum pergola?
The installation time depends on the pergola size and your experience. Most DIY projects take 6–8 hours. Larger or more complex designs may require additional time.
Tip: Plan your day and gather all tools beforehand to streamline the process.
Can I install an aluminum pergola on uneven ground?
Yes, you can. Use concrete footings or adjustable post bases to level the structure. These methods ensure stability and prevent wobbling.
Note: Always check the ground with a level before starting the installation.
Do I need a permit to install a pergola?
Permits depend on local regulations. Check zoning requirements for height limits, setbacks, and materials. Contact your local building authority for guidance.
Alert: Avoid fines by confirming permit needs before beginning your project.
How do I maintain my aluminum pergola?
Clean it regularly with mild soap and water. Inspect for loose bolts or screws. Apply protective coatings if exposed to extreme weather.
Maintenance Task |
Frequency |
Tools Needed |
|---|---|---|
Cleaning |
Monthly |
Soap, water, sponge |
Bolt Inspection |
Quarterly |
Wrench, screwdriver |
Can I customize my pergola after installation?
Absolutely! Add string lights, outdoor curtains, or hanging plants for decoration. You can also install privacy screens or retractable canopies for added functionality.
Tip: Choose weather-resistant accessories to ensure durability outdoors.


